
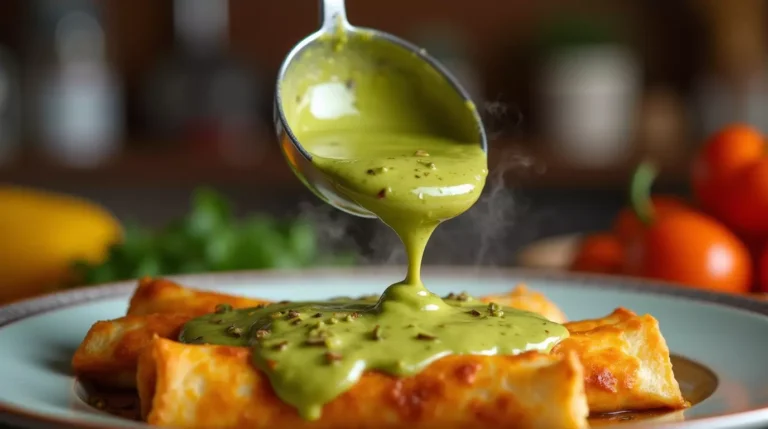
Have you ever had something that feels both familiar and exciting all at the same time? That’s what green chili gravy is to me now, a true staple in Southwestern cuisine. It’s warm and hearty, with just the right edge of spiciness. The first time I tasted it remains etched in my memory. I was in a small diner in New Mexico, and one could smell the rich aroma all around. One bite and I was done for! Now, I bring the recipe to you.
This guide will just make it easy for you; no, you don’t have to be a great expert in cooking because a few simple ingredients and you can make this mouth-watering gravy right at your home. Now boost the delights of your meals by dipping them in this great green chili gravy!
What is Green Chili Gravy?
Thus, what really forms the Green Chili Gravy? This is a question that most people ask, especially those who are not conversant with some of the South Western or New Mexican traditions in cooking. The green chili gravy is a green chilies-based sauce that forms an integral part in South Western and New Mexican dishes. Traditional green chili gravy is not made thick using flour; it is thin and carries more taste within itself and yet it is quite flexible; you can have it in burritos, enchiladas, eggs and much more which would give unique delicious blends in whatever dish it touches.
The Star: Green Chiles
Of course, the undisputed star of the show is green chiles. They are the flavor and heat. Hatch chiles specifically garner a lot of credibility for that earthy flavor they carry, but other varieties are not unwelcome either. For instance, Anaheim or poblano peppers are good choices too. Crucially, what you have to do is just roast the chiles. That’s going to be enough to bring out their inherent sweetness and add a depth of smokiness.
The Supporting Cast
Besides the chiles, a few other ingredients make the most important contribution. For example, onions and garlic for sure build up the savor base. Then there’s cumin and oregano to spice up the flavor. Plus, I’ll have a little flour hanging out before I thicken it with the other guys. That would generally be chicken or vegetable broth. All told, the result will be a very flavored, balanced gravy.
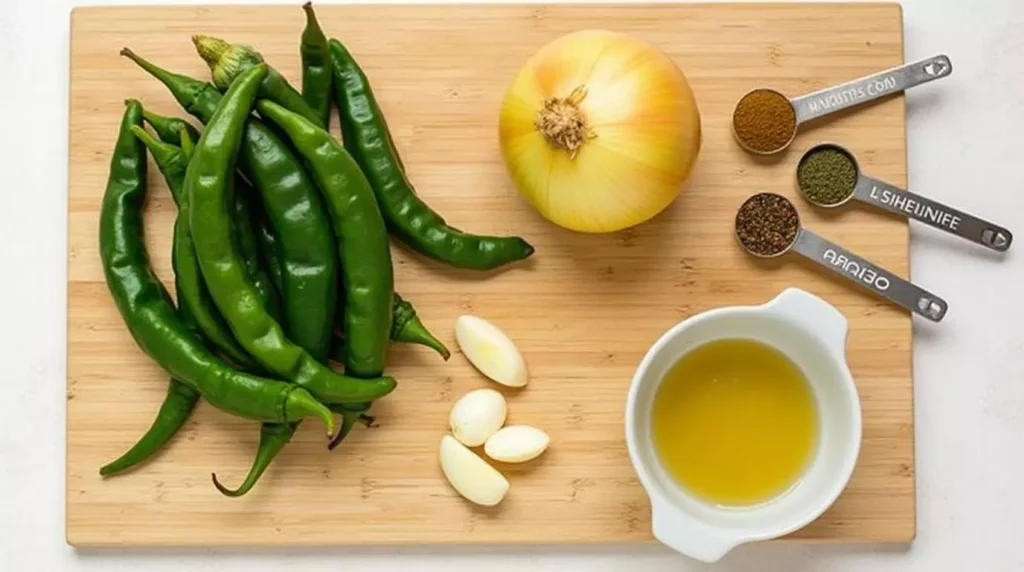
Assembling Your Ingredients: The Checklist for Success
With a better understanding of the gravy itself, let’s start collecting your ingredients. Fresh, high quality ingredients will make a noticeable difference in the taste of your green chili gravy. Here’s what you’ll need:
| Ingredients | Quantity | Notes |
|---|---|---|
| Fresh Green Chiles | 1 pound (about 10-12 medium) | Hatch, Anaheim or Poblano |
| Yellow Onion | 1 medium | Chopped |
| Garlic | 3 cloves | Minced |
| Olive Oil or Vegetable Oil | 2 tablespoons | |
| All-Purpose Flour | 2 tablespoons | |
| Chicken or Vegetable Broth | 2 cups | Low-sodium preferred |
| Ground Cumin | 1 teaspoon | |
| Dried Oregano | 1/2 teaspoon | Mexican oregano preferred |
| Salt | To taste | |
| Black Pepper | To taste | Freshly ground, optional |
Choosing Your Chiles
There’s a lot you can do with chiles. Some consumers enjoy Hatch chiles specifically for their unique taste. Others prefer Anaheim chiles because they are not as hot. Still, other foodies might find it to be poblano chiles, due to their mild, yet fuller earthy flavor. Therefore, your choice, really, is all that matters! Either way, though, be sure to ensure their freshness.
The Secret to Flavor: Roasting the Chiles
You might now wonder, why is roasting pretty important? Because roasting brings out the chiles’ flavor! More importantly, it loosens their skins. You roast them under the broiler or on a grill or even over a gas stovetop. Remember, the skin should be black and blistered. Moreover, this imparts a nice smoky undertone to the green chili gravy.
Preparing the Ingredients: For an Efficient Process
With the chiles addressed, prepare your other components! While the chiles are roasting, chop your onion. Then, mince your garlic. After that, measure out your spices. Finally, have your broth standing by. As a result, that way, everything is handy and ready to streamline your cooking process once the chile is roasted and you go into making your gravy.
Step-by-Step: How to Make Green Chili Gravy
Prepare the Chiles
- Roast the Chiles: First, place the chiles under the broiler or on a hot grill or a gas stovetop, turning them occasionally until their skin is charred and blistered, which will take about 5-10 minutes.
- Steam the Chiles: Next, take the roasted chiles in a bowl. Cover it with plastic wrap or a lid so that the vapors will be captured well within the bowl. After that, leave it for about 15-20 minutes. It will help in loosening of their skin.
- Peel and Seed the Chiles: After steaming, peel the poblanos, then remove the stems and seeds, chopping them up into small pieces afterwards.
Create the Gravy
- Sauté the Onion and Garlic: Start on” streaming the chilies then in a saucepan, heat oil over medium heat, sauté onion until soft for about 5 minutes. Add minced garlic and sauté for 1 minute more or until fragrant.
- Make a Roux: Now, ‘spinkle’a lttle flour ovr th onins ‘nd garlic, stirring well for 1-2 minutes, knowing that this will be your roux to help thicken the gravy.
- Add Broth and Spices: Subsequently, whisk in the broth slowly, bringing it to a simmer, stirring in the cumin and the oregano towards the end and seasoning with salt and pepper.
- Add the Chiles: Following that, add the chopped roasted chiles to the sauce, stirring well to combine.
- Simmer and Adjust: Then, reduce the heat to low. Allow the gravy to simmer for at least 15 minutes. For a fuller flavor, simmer for 30 minutes, but be sure to stir occasionally. If it is too thick, add more broth. Otherwise, if it is too thin, simmer a little longer. Taste the gravy, adding salt, pepper, or spices as needed.
Finishing Touches
- Broil: Preheat your broiler. Place the chiles on a baking sheet and slide them under the broiler. Roast until the skin blisters and turns black.
- Post Cooking: Transfer immediately to a bowl, and cover tightly with plastic wrap (this will steam the chiles, loosening the skin). Let them rest in the bowl for at least 5 minutes.
- Cooling with Ice Water: Finally, remember that another way to peel roasted chiles is to cool them under running ice water, which also helps in softening the skin and makes it easier to remove.
Tips for Roasting Chiles
Watch the chiles very carefully as they roast. You’re looking for that charred look on them, not burnt. Turn them with tongs so all sides roast evenly. Do not forget this step. All of the skin will come off so easily.
Techniques to Help You Achieve Great Results
Note: These values are rough estimates. They may vary.

Green Chili Gravy
- Total Time: 35 minutes
- Yield: 6 servings 1x
Description
A flavorful and authentic green chili gravy that’s perfect for Southwestern and New Mexican dishes. This homemade recipe uses roasted green chiles for a smoky depth and a rich, savory taste.
Ingredients
- 1 pound fresh green chiles (Hatch, Anaheim, or Poblano)
- 1 medium yellow onion, chopped
- 3 cloves garlic, minced
- 2 tablespoons olive oil or vegetable oil
- 2 tablespoons all-purpose flour
- 2 cups chicken or vegetable broth (low sodium preferred)
- 1 teaspoon ground cumin
- ½ teaspoon dried oregano (Mexican oregano preferred)
- Salt, to taste
- Black pepper, to taste
Instructions
Step 1 – Prepare the Chiles
- Roast the chiles under a broiler, on a grill, or over a gas stovetop until the skin is blistered.
- Place the roasted chiles in a bowl and cover with plastic wrap for 15 minutes to steam.
- Peel the skins, remove stems and seeds, then chop into small pieces.
Step 2 – Sauté the Aromatics
- Heat oil in a saucepan over medium heat.
- Add chopped onions and sauté until soft (about 5 minutes).
- Stir in minced garlic and cook for another minute.
Step 3 – Make the Roux
- Sprinkle the flour over the onions and garlic, stirring constantly for 1-2 minutes.
- This will help thicken the gravy.
Step 4 – Add Broth and Spices
- Slowly whisk in the broth, stirring continuously to avoid lumps.
- Add cumin, oregano, salt, and black pepper.
- Bring the mixture to a simmer.
Step 5 – Add the Chiles
- Stir in the chopped roasted chiles, combining well with the sauce.
- Simmer on low heat for 15-30 minutes, stirring occasionally.
- Adjust thickness with additional broth if needed.
- Prep Time: 15 minutes
- Cook Time: 20 minutes
- Category: Sauce, Gravy
- Cuisine: Southwestern, New Mexican
Nutrition
- Calories: 90 kcal
- Sugar: 2g
- Sodium: 300mg
- Fat: 5g
- Saturated Fat: 1g
- Carbohydrates: 8g
- Fiber: 2g
- Protein: 2g
- Cholesterol: 0mg
Keywords: Green Chili Gravy
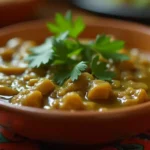
Serving Suggestions and Beyond
A yummy bowl of made-from-scratch green chili gravy. Ready to be devoured.Serving Ideas, and Otherwise This green chili gravy is very flexible. Here is what to use it for:Traditional Uses Pour over burritos or enchiladas. Pour ‘sauce’ over your eggs. Layer on nachos. It’s a yummy addition to a lot of food so, of course, you’ll want to put it on everything! Creative Turns
Sprinkle it over soups or put it in stews. Enjoy it as a marinade for barbecued meats. Serve with rice or mix into beans for great flavor-it imparts a Southwestern taste to just about anything. And try it on our Sweet Potato Casserole, for a savory spin on a sweet side dish! Use the Alfredo Lasagna for another application—a fantastic fusion between the two dishes.
Having various flavors use this with our New Orleans Soaked Dressing for something different. It works with our Leche de Tigre recipe in complementing flavors. Hungry? Maybe our Protein Cookies or Protein Bars can help.
Frequently Asked Questions (FAQ)
- Q: Can I use canned chiles? A: Fresh, roasted chiles are best. That’s the flavor of the dish, and they really do provide the best flavor. However, if you absolutely must, you can use canned, but make it fire-roasted if at all possible.
- Q: How do I store leftover gravy? A: Store it in an airtight container. In the fridge; it will last up to four days.
- Q: Can I freeze it? A: Yes, you can. Cool on a wire rack without covering and place in a freezer-safe container. Do not forget to label and freeze up to three months is the recommended time for storage. To thaw: thaw in the refrigerator overnight.
- Q: Is it very spicy? A: The heat level really depends on the chiles. Hatch chiles aren’t always consistent in heat. Anaheim chiles are much milder. Use your judgment.
- Q: What if I don’t have a broiler or grill? A: You can roast the chiles on a gas stovetop. Hold them over the flame with tongs. Rotate until charred.
- Q: Can I make it vegetarian? A: Absolutely! Use vegetable broth instead of chicken broth.
- Q: My gravy is too thick. What should I do? A: Just add more broth. Stir until you reach the desired consistency.
Conclusion
So, you are prepared to make your green chili gravy. It is a very, very tasty seasoning that combines numerous dishes and is representative of one culinary phenomenon. This is an adventurous recipe. Here’s how the recipe breaks down It’s really pretty easy to get a good gravy with just a few easy steps. Your friends and your family members will just love it, trust me! So, start preparing it now, get all the required ingredients and begin cooking. To learn everything on how to cook with hot peppers consider both of these terrific sites: Chili Pepper Madness and Bon Appétit – Chile Pepper. Relish the process. And more importantly, relish those awesome results!